Assignment 4: Opacity Maps

leaves

leaves2

bamboo-leaves

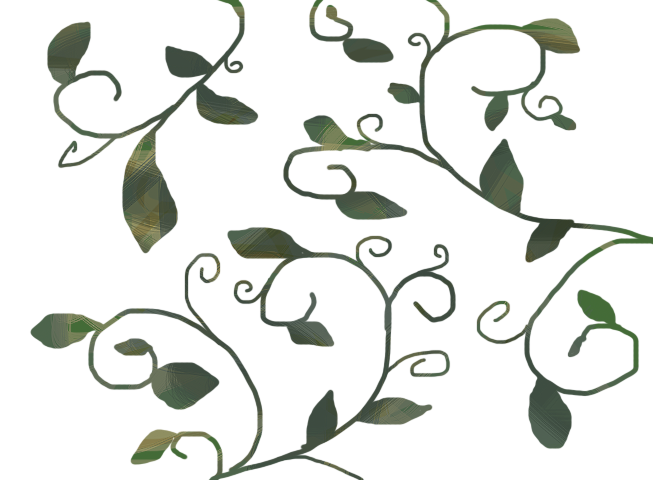
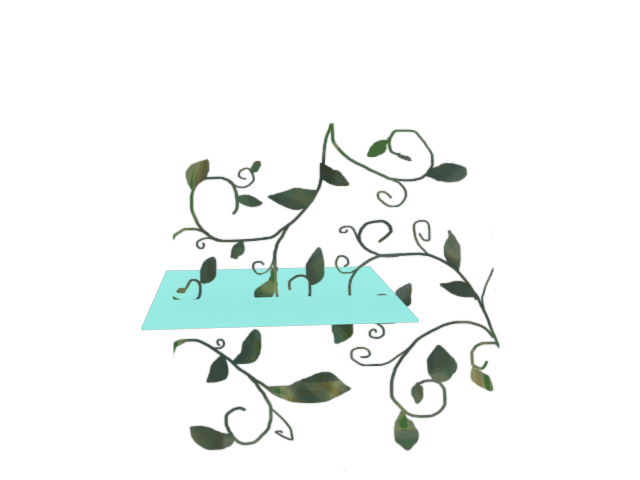
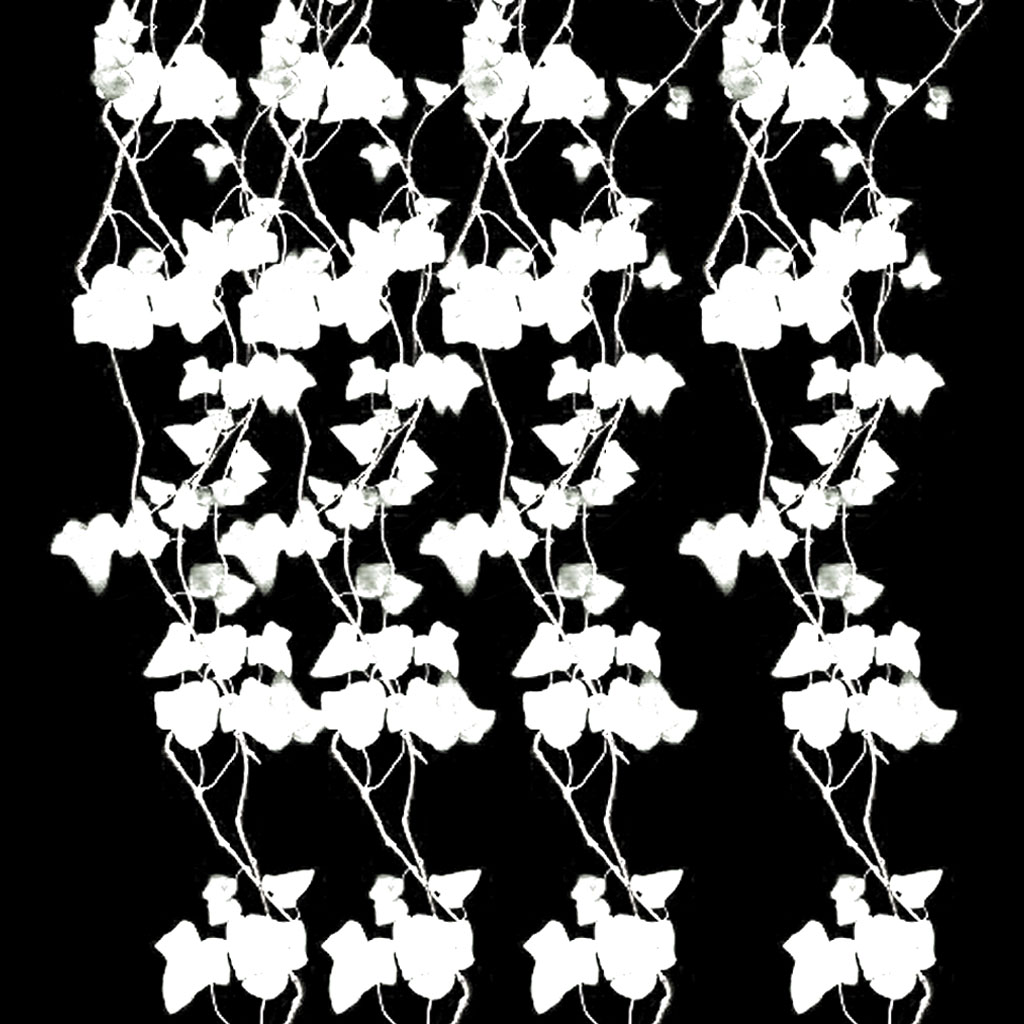
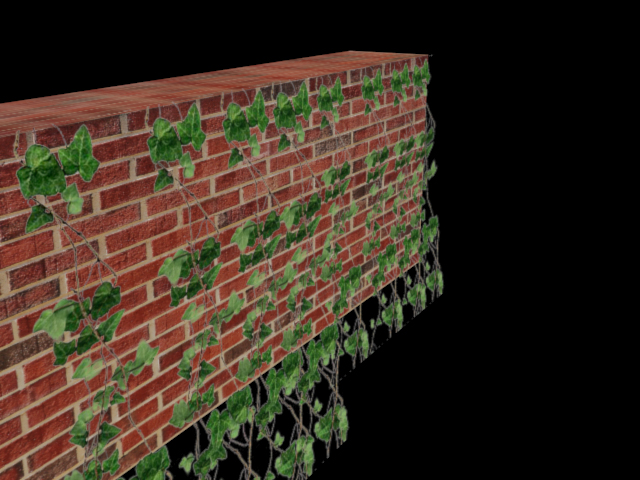
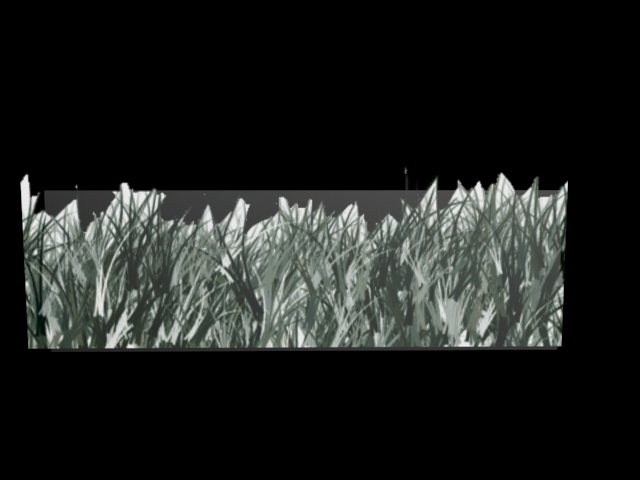
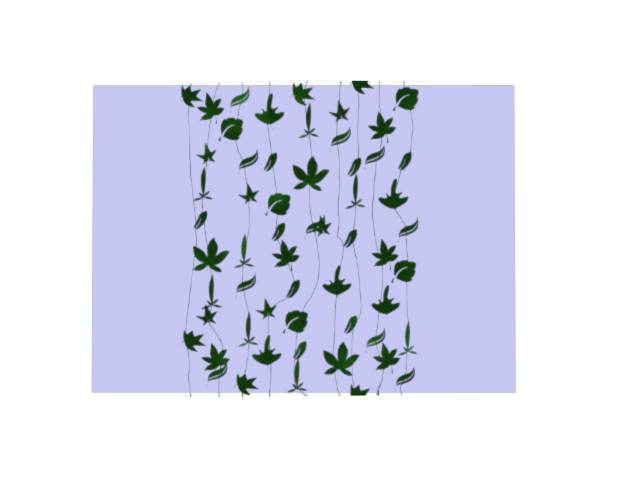
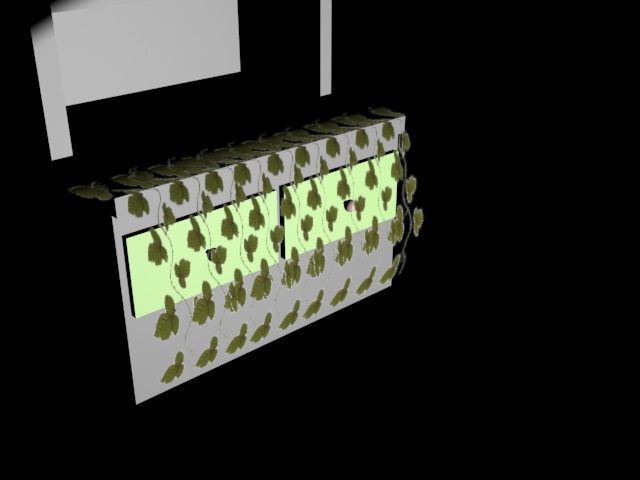
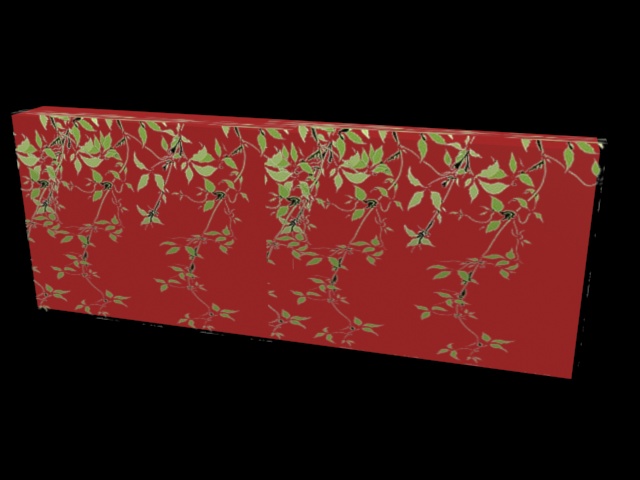
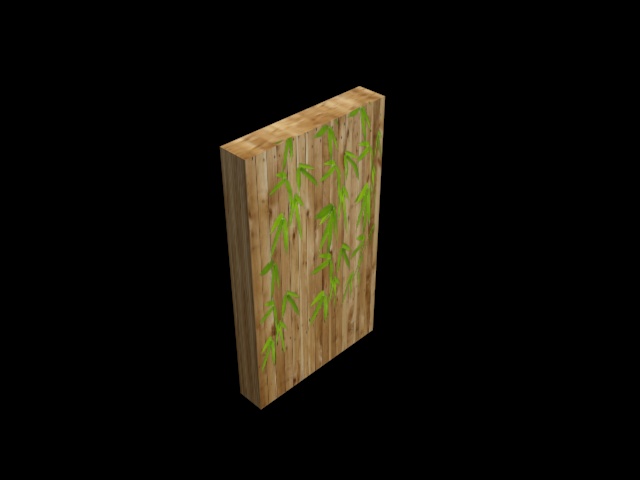
I created the maps using groups of leaves coming from each other in photoshop and did the simple steps to make them a diffuse, alpha and opacity map.  When after I modeled a plane in max, I warped the leaves using edit poly and pinching and pulling centers of the leaves. I wanted the effect of the the leaves coming from within the fences so I also pushed the top part of the leaves using edit poly to give it such an effect.

Assignment 4: Opacity Maps

The creation of my opacity map was fairly simple. I modeled out the plane and used the move tool to warp some of the edges to create something of a wave effect in the vines. Designing the vines involved downloading a leaf brush pack and laying down random leaves in Photoshop. Afterward, I used the ruler tool and a thin paintbrush to connect the leaves with vines. The ruler tool ensured that the vines would line up top to bottom, so they could be tiled.

Render01

Render02

Assignment#4 Opacity map David Schlotterbeck

Davids Vines

This assignment seemed simple enough. the only challenge was making the vines themselves becuase the ground work was easy.

I figured the vines would be so small you would have to be rob to notice irregularities so I went ahead and took a picture of a leaf and resized it over and over again to mathc my neededs. Taking the color of the leaves i created a stem of which was a basic line for all the leaves to connect to.

In the end if i took my final render and made them all smaller just to copy and paste them again it would look more realistic then what it is at now.

Assignment 4: Foliage Opacity Map

Grass_done
This is my finished assignment, I started to do vines but did not like the way it turned out so did this instead. All I did was use the two layers. The first layer was the diffuse-added the colors I wanted. Then I just duplicated the layer and used the image color adjuster to change it to white.

Here is my opacity and diffuse.
grass_diff
grass

Assignment 4_Opacity maps

Assignment 4_opcaity maps


For my design, I was going for overgrown weeds growing over a wall. I think better than I thought i would once understood the steps. I think my problem was that I didn’t go in and delete the small parts in the diffuse map. I kept having problem when I found some parts weren’t deleted. It was because I tried painting some parts black, but I realized I had to delete them completly

Assignment 4: Maps….Now with Opacity!!!!

For my Opacity Maps I played mostly with the brushes that i used to make my “grass”. I went for kind of a old, dead look for my grass,  so my opacity map painted over  some of the edges and around where the grass would be black, while the rest of the map would be white. For the grass, I used a grass brush that I found on deviantart. To show what the texture looks like I used a House thing.


Grass Render

Assignment 4: Opacity

In my post I have included 4 pictures of my rendered products from my opacity maps.  In my design process The first thing I did was to decide what elements I wanted on a brick wall that I will display.  Once I applied an UVW map on a box I created a simulated brick wall.  For my opacity map I made a plane in 3ds max and set it as close to the brick wall as possible without intersecting it.  I dediced to make some stars that was multicolored to put on the background.  Inside photoshop I created one layer that was called my color map with the colored stars and then I recreated another layer with the black and white version by changing the settings in photoshop and making the background black so it doesn’t show in the render in 3ds max.  Below is my examples of make and opacity map on a brick wall.view 1 view2 view3 view4