Design Brief Final – Dumpster – KerwanJ

Final_Composition

Click to Enlarge

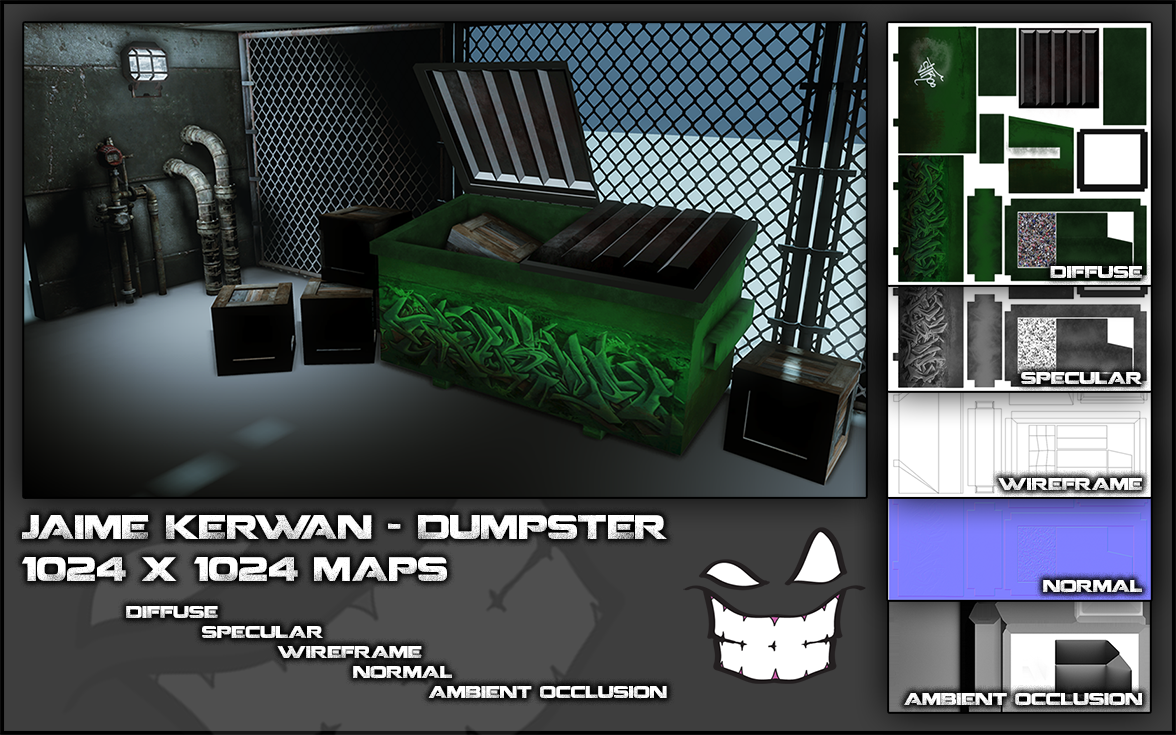
My original mood board for this project was geared towards a more “military” look, but during the unwrap process, I realized that the structure of the dumpster didn’t fit the style I was going for.  It was then that I decided to alter it towards an inner city dumpster tagged with graffiti.  Rusted around the base and filled with trash, I felt this was a much more suitable style for the model.  Creating the diffuse map was fairly easy once I had my UVs laid out comfortably.  Ndo2 came in quite handy, once I was ready to move forward in creating the Specular and Normal Maps.  A quick bake in 3dsMax supplied me with a fairly decent AO map.  Simple additions of alternate assets in UDK gave it a more “belonging and believable” real-world feel.  Overall, I am pretty happy with the outcome.

The final composition was a trial and error effort in Photoshop, as I was trying to make it feel complete while showing the render in the most acceptable fashion.  I decided to layer the maps down the side as I didn’t feel it was absolutely necessary to show each one.  The most important one, the diffuse map, is in full view at the top.  I also included a listing of what maps were displayed in the final compostion as well as the overall map size.  I didn’t include the poly count as the model is not mine.  The finishing touch came once I added my logo.  A faint duplicate of my logo can be seen behind the statistics, which I included to break up the plain, boring grey.

Case Study 4: Textures for the first time : Kerwan J

For the metal, I did mine to get more of a etched polished look.  Instead of repeating the render clouds multiple times, I only did it once.  At the end, I used Blur (shape blur; Box) to soften it and adjusted the levels to lighten the final appearance.Game225_Metal_KerwanJ


For the wood, I pretty much did my own thing after reading what the book suggested.  I started with render clouds after selecting both a dark and light brown color for my foreground and background colors.  Then, with render fibers, I adjusted it in the preview window till I was satisfied with the amount of contrast.  I then duplicated the layer and added bevel and emboss to give it a slight highlight on the edge.  With the selection tool, I deleted segments from the layer with the bevel and emboss to give it a wooden plank feel.  Still on the top layer, I used Filter>Liquify; and the bulge tool to creat wooden knots in the planks.  Finally, I adjusted the levels on the bottom layer to darken it (Not black), making the planks really stand out

Game225_Wood_KerwanJ

Case Study #2 : References_KerwanJ

– Ben Neall

http://bneall.blogspot.com/p/gallery.html

– Digital Domain

– Mostly worked on texturing 3d models for film but has also worked on some games. 

Real Steel RS_torso


Transformers 2


Underworld 2  U2_Head


  PrimEvil


Fossil Fighters for Nintendo  FF_Rex

– VFX Texture Painter


1-  Whether its for movie or game, fantasy or realistic, Ben’s attention to detail is mindblowing.  He knows how to bring the models to life without overworking each piece.

2- It seems to be more about knowing how to get the desired effect, without trying to get it from the beginning stroke.  Layering in PS is one of the main keys to great texture work.  You can see in some of his works, the process he took required multiple passes.

Case Study#1 UV Master-Zbrush_KerwanJ

UVMaster_flatten


URL:   http://www.pixologic.com/zclassroom/homeroom/lesson/uv-master/

This url has multiple tutorials for this method

Question#1: What was their method of unwrapping? What steps were taken and why?

UV Master is a Zbrush plugin that allows for the artist to paint in a general manner, the areas in which they wish the UV seams to be.
The initial step is to work on a clone of the model: this allows the artist to work out their UVs without risk of altering the initial model
the next step is to paint in the protection mask: this tells the computer that the painted area (in red) is an area the artist doesn’t want seams to be
the next step is to paint in the attraction mask: this tells the computer that the painted area (in blue) is an area the artist does want the seams to be
the final step is to copy the UVs to the original model: this applies the approved unwrap to the original model so that texturing may begin

Question#2: From what you saw in their tutorial, was there anything from their technique that you found interesting or unusual? Why?

I found the overall concept of this method brilliant, instead of having to go in and select the individual edges for the desired UV seam (as you would in 3dsMax or Maya), this method allows for quick and accurate gestures to determine the UVs.  This process can save hours in comparison to others

Question#3: Knowing what you know now, and seeing others working on the same material you are, what are your expectations or feelings on the matters of unwrapping?

It’s good to know that there are alternative ways of accomplishing tasks.  Sometimes other programs may offer a more efficient way of solving problems, which is key in this industry.

———————————————————————————————————