![Game225_Project2_moodboard_carl_carmen[1]](https://iadtgame225.wordpress.com/wp-content/uploads/2012/12/game225_project2_moodboard_carl_carmen1.jpg?w=538)
This project was to texture a tunnel, that could be repeatedly implemented, without obvious showings of the texture being over-layed again and again, a modular tunnel.
My inspiration initially came from the Halo games, more specifically Forerunner architecture. With the tunnel made from the rock that surrounds it, but also having implementation of metal beams supporting the rock.The metal supports have a very subtle texture to them, a texture I created myself, with the use of (Styles?) in Photoshop, such as cross-hashing, and other styles to certain extents. Ending with a familiar yet unknown metal, which was my intention, and I feel contributes to the Forerunners evasive legacy.
The rock was a texture that I found online and then edited it to make it tile-able, and look the part also. Even though in some areas you can see that some areas are the same, I believe when it comes to rock, there usually are some patterns, especially if the rock is “man-made”(Forerunner, in this circumstance), or at least carved so in that fashion. Initially the rock was going to be covered in a type of moss/lichen, but found out through trial and error that that became difficult to accomplish the tile-able look with the rock and moss being cohesive together. So I scrapped the moss, and stayed with the rock, which was easier to deal with, and I felt I could back it up with slightly repeating textures, as I said before.
Overall I’m feeling pretty satisfied about the final outcome, and can even see this tunnel inside a Halo game, in my opinion. Here is a scene with the tunnel repeating, and a screen grab from a Halo game at the end:

Forgive the blurriness dropbox doesn’t seem to like PNG/Targas…
-CarlC
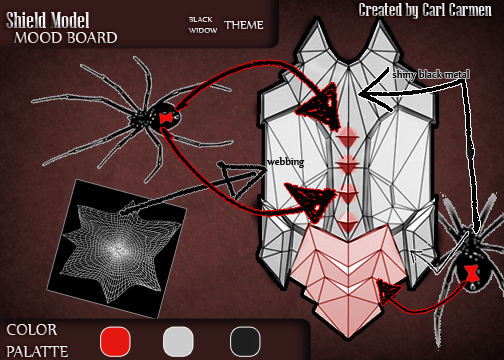
![Game225_Project1_moodboard_carl_carmen[1]](https://iadtgame225.wordpress.com/wp-content/uploads/2012/12/game225_project1_moodboard_carl_carmen1.jpg?w=538)